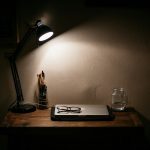
Ever wondered if your trusty student desk lamp needs a little TLC beyond just flicking the switch? The short answer is a resounding yes! A well-maintained lamp isn’t just about aesthetics; it directly impacts your study environment by ensuring optimal light output, extending the lamp’s lifespan, and even contributing to safer operation. Think of it as a small investment in your academic success and peace of mind. Let’s get into the practical steps to keep your study space bright and clear.
Why Your Desk Lamp Deserves Attention
It’s easy to overlook something as seemingly simple as a desk lamp. It sits there, does its job, and you probably don’t give it a second thought until the bulb blows. However, dust, grime, and general wear and tear can significantly degrade its performance and even pose minor hazards. Taking a few minutes for regular cleaning and maintenance can make a real difference to your study experience. You’ll get more effective illumination, reduce strain on your eyes, and avoid premature replacements.
The Impact of Dust and Grime
Dust isn’t just an aesthetic nuisance. On a desk lamp, it acts as a subtle filter, diminishing the light output. A layer of dust on the bulb or shade can block a surprising amount of light, forcing your eyes to work harder. This can lead to eye strain, headaches, and overall fatigue, especially during long study sessions. Beyond light reduction, dust can also trap heat, potentially shortening the lifespan of your bulb and, in rare cases, even affecting the lamp’s internal components. For LED lamps, which rely on efficient heat dissipation, dust can directly impact their longevity and performance.
Extending Lamp Lifespan and Efficiency
Regular cleaning and proper handling are key to getting the most out of your desk lamp. Keeping components free of dust and debris ensures they operate at their intended efficiency. For instance, a clean reflective surface inside the lamp head maximizes light projection. A well-maintained electrical cord, free from kinks and damage, prevents wear that could lead to electrical issues. By being proactive, you’re not just ensuring a bright study space for today, but also for many semesters to come, saving you the hassle and cost of frequent replacements.
Essential Tools for a Sparkling Lamp
Before you dive into cleaning, gathering the right tools makes the process much smoother and safer. You probably have most of these lying around, so there’s no need for special purchases. The goal is gentle, effective cleaning without damaging any components.
Gathering Your Cleaning Arsenal
You’ll need a few basics: a soft, lint-free cloth (microfiber is excellent), a can of compressed air, a small, soft brush (an old, clean paintbrush or a soft toothbrush works well), and a mild all-purpose cleaner or a solution of mild dish soap and water. For glass components, a glass cleaner might also be useful. Always avoid harsh abrasives or chemical cleaners that could damage finishes or plastics. Safety glasses are also a good idea, especially when using compressed air, to protect your eyes from flying dust.
Safety First: Disconnecting Power
This is the most crucial step before any cleaning or maintenance. Always, always unplug your lamp from the wall outlet before you start. This eliminates any risk of electric shock or accidentally activating the lamp while you’re working on it. It’s a simple but absolutely vital precaution that should never be skipped.
Step-by-Step Cleaning Process
Once you’ve got your tools and ensured the lamp is unplugged, you’re ready to get down to business. We’ll break it down into manageable sections, tackling each part of the lamp systematically.
Dusting the Exterior and Base
Start with the most obvious culprit: dust. Use your soft, lint-free cloth to wipe down the entire exterior surface of the lamp – the base, the arm, and the outside of the lamp head. For crevices and hard-to-reach areas, employ your soft brush or a cotton swab. This initial pass removes the bulk of the loose dust. If there are any sticky spots or grime, dampen your cloth with your mild cleaner solution and gently wipe them away. Always ensure the cloth is only damp, not dripping wet, to prevent water from entering electrical components.
Cleaning the Lamp Shade and Reflector
The shade is a key player in directing light, so keeping it clean is essential.
Cleaning Fabric Shades
For fabric shades, a lint roller or a vacuum cleaner with a brush attachment can effectively remove dust and pet hair. For more stubborn marks, a very slightly damp cloth with mild soap can be used, but always spot-test in an inconspicuous area first to ensure it doesn’t leave water marks or discolor the fabric. Allow it to air dry completely. Never saturate a fabric shade.
Cleaning Metal or Plastic Shades
Metal or plastic shades can be wiped down with a damp cloth and mild cleaner. Pay special attention to the inner reflective surface. This is where compressed air can come in handy to dislodge dust from vents or intricate designs. Ensure these surfaces are completely dry before reassembling.
Tackling the Inner Reflector
Many lamps have a reflective interior to maximize light output. Dust and smudges on this surface can significantly reduce efficiency. Gently wipe it with a soft, dry cloth. If it’s particularly grimy, a very lightly damp cloth with water can be used, followed immediately by drying with another soft, dry cloth to prevent streaks.
Bulb Cleaning and Inspection
Believe it or not, even bulbs can get dusty, which diminishes their brightness.
Safely Removing the Bulb
First, ensure the lamp has been off for a while and the bulb is cool to the touch. Gently twist the bulb counter-clockwise to remove it from the socket. Handle bulbs by their base or non-illuminating part to avoid leaving fingerprints, especially on halogen or incandescent bulbs, as oils from your skin can create hot spots and shorten their lifespan.
Wiping Down the Bulb
With the bulb safely removed, use a clean, dry, soft cloth to gently wipe away any dust or smudges. For incandescent or halogen bulbs, avoid using any liquids. For LEDs, a slightly damp cloth is usually fine, but ensure it’s dry before reinstallation. Inspect the bulb for any cracks, discoloration, or signs of wear. If it looks compromised, it’s best to replace it.
Cleaning the Bulb Socket
Before reinstalling the bulb, take a moment to inspect the bulb socket itself. Use a can of compressed air to blow out any dust or debris that might have accumulated inside. Never insert anything metal into the socket. If you notice any corrosion or damage, it’s a good idea to have the lamp professionally inspected.
Maintenance for Longevity
Beyond cleaning, a few regular checks and practices can significantly extend your lamp’s life and ensure it operates safely and effectively. This isn’t about deep cleaning, but more about preventative care.
Checking the Cord and Plug
The power cord is often subjected to bending, pulling, and accidental snags. Regularly inspect the entire length of the cord for any signs of fraying, cuts, or exposed wires. Pay close attention to the areas where the cord enters the lamp base and where it meets the plug. If you find any damage, stop using the lamp immediately and either have the cord replaced by a qualified electrician or replace the lamp entirely. Never try to repair a damaged cord with electrical tape; it’s a temporary and unsafe fix. Also, check the plug itself for bent prongs or any discoloration, which could indicate overheating.
Tightening Loose Joints and Screws
Over time, the joints and screws on adjustable desk lamps can loosen, leading to wobbling or difficulty holding a position. Periodically check these connections. Using the appropriate screwdriver, gently tighten any loose screws. Be careful not to overtighten, as this can strip the threads or crack plastic components. If a joint continues to be loose after tightening, it might be a sign of wear, and you might consider a small dab of thread locker (designed for electronics) to help secure it, or consult a repair guide for your specific lamp model.
Bulb Replacement Best Practices
When a bulb finally gives out, simply swapping it out seems straightforward. However, a few practices can make the process smoother and safer.
Choosing the Right Bulb
Always replace a bulb with one of the correct type and wattage specified by the lamp manufacturer. Over-wattage bulbs can overheat the lamp, damage components, and even pose a fire risk. For LED conversions, ensure the LED bulb is compatible with your lamp (e.g., dimmable LEDs for dimmable lamps). Check the base type (e.g., E26, E12) to ensure it fits.
Proper Installation
As mentioned during cleaning, ensure the lamp is unplugged and the old bulb is cool. When installing the new bulb, handle it carefully, gripping the base if possible. Screw it in gently until it’s snug, but don’t overtighten, as this can damage the socket or the bulb’s base. Once installed, plug the lamp back in and test it.
Safe Disposal of Old Bulbs
Different types of bulbs require different disposal methods. Incandescent and halogen bulbs can generally be disposed of with regular household waste. Compact Fluorescent Lamps (CFLs) contain small amounts of mercury and should be recycled at designated collection points. Many hardware stores offer CFL recycling programs. LED bulbs are generally safe for regular trash but can often be recycled as e-waste, which is a more environmentally friendly option. Check with your local waste management services for specific guidelines.
Troubleshooting Common Lamp Issues
Even with the best maintenance, sometimes things go wrong. Here are a few common issues and straightforward steps to troubleshoot them before you consider replacing your lamp.
Lamp Not Turning On
This is probably the most common and frustrating issue.
Checking the Power Source
First, ensure the lamp is securely plugged into a working outlet. Test the outlet with another appliance (like a phone charger) to confirm it’s live. If the outlet is connected to a switch or a power strip, check those as well. Sometimes, a tripped circuit breaker can also be the culprit, so check your home’s electrical panel.
Inspecting the Bulb
Even new bulbs can be faulty. Remove the bulb and visually inspect the filament (for incandescent/halogen) or the base connections (for LED/CFL). If you have another working lamp with the same bulb type, try swapping the bulb to confirm if the issue is with the bulb or the lamp itself.
Examining the Switch
If the bulb and power source are fine, the switch might be the problem. Wiggle the switch gently to see if it makes contact. Some lamps have inline cord switches that can fail. If you’re comfortable with basic electrical work, you might be able to replace the switch, but if not, it’s best to consult an electrician or replace the lamp.
Flickering Light
A flickering light can be irritating and cause eye strain.
Loose Bulb or Connection
The most common reason for flickering is a loose bulb. Gently tighten the bulb in its socket. If that doesn’t work, unscrew the bulb and inspect the metal tab inside the socket. Sometimes, this tab can get flattened, preventing good contact. With the lamp unplugged, you can gently pry it up slightly with a small screwdriver (be very careful!).
Incorrect Bulb Type
Using an incompatible bulb (e.g., a non-dimmable LED in a dimmable lamp, or a bulb that exceeds the lamp’s wattage) can cause flickering. Ensure you’re using the correct bulb type and wattage.
Wiring Issues
If the above steps don’t resolve the flickering, there might be a wiring issue within the lamp or even within your home’s electrical system. At this point, if you’re not comfortable inspecting internal wiring, it’s best to consult a qualified electrician.
Overheating Lamp Components
A lamp that gets excessively hot is a safety concern.
Incorrect Bulb Wattage
This is the primary cause of overheating. If you’ve installed a bulb with a wattage higher than the lamp’s maximum rating, it will generate too much heat for the lamp to dissipate safely. Immediately replace it with a bulb of the correct wattage or lower.
Poor Ventilation
Ensure the lamp’s head or shade isn’t obstructed, which could trap heat. If the lamp has vents, ensure they are free of dust and debris.
Internal Wiring Issues
If the lamp continues to overheat even with the correct bulb and good ventilation, there might be an internal wiring issue or a component failure. Stop using the lamp immediately and have it inspected by a professional. Overheating can damage the lamp and potentially lead to fire hazards.
Maintaining a Bright and Safe Study Space
Keeping your student desk lamp clean and well-maintained isn’t a monumental task, but rather a series of small, easy steps that pay off significantly. By dedicating a little time to dusting, inspecting, and troubleshooting, you ensure a consistent source of bright, effective light for your studies. This not only supports your academic efforts by reducing eye strain and improving focus, but also extends the life of your lamp and promotes a safer environment. A bright study space is a productive study space, and it all starts with a lamp that’s been given a little love.